
🛒 Best Price Today on Amazon
Prime members get fast, free shipping on everything above, plus member-only deals. New members get a 30-day free trial — cancel anytime.
- Best Premium Portable Solar Panel Kits for Overlanding
- Shortlist by overlanding situation
- Portable panel comparison
- What the ratings mean on a real trip
- Choose by trip length, space, and setup tolerance
- Compatibility and setup: avoid the costly mismatch
- Weather resistance and long-term ownership
- Bottom line
- Related Guides
Best Premium Portable Solar Panel Kits for Overlanding
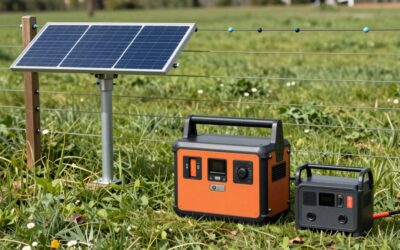
The best premium portable solar panel kit for off-grid overlanding is a foldable 200–220W panel paired with a power station that accepts its voltage and connector: it balances useful daily charging with manageable packed size, while 400W kits make more sense for longer stays and larger batteries. For the strongest mix of portability and output, consider the EcoFlow 220W Bifacial Portable Solar Panel; choose the Jackery SolarSaga 200W if your power station’s input limits and connector match, or step up to a 400W-class setup when you have room to carry it.
Those are starting points, not universal pairings. Solar-panel model revisions, regional versions, and power-station input specifications can differ. Check the exact manual for maximum solar input voltage, current, and wattage before buying. A panel that physically plugs in may still be electrically incompatible.
Shortlist by overlanding situation
- Best balance for a typical two-person trip: EcoFlow 220W Bifacial Portable Solar Panel. Its folding format and extra rear-side collection can make it a useful compromise between carrying bulk and harvesting more energy in open, reflective terrain.
- Best for an existing Jackery setup: Jackery SolarSaga 200W, provided the specific power station supports its output and the correct cable or adapter is available.
- Best for extended camps with high daily demand: A compatible 400W-class foldable panel, such as the EcoFlow 400W Portable Solar Panel. Expect more weight and a larger setup footprint.
- Best when roof space and security matter more than portability: A rigid vehicle-mounted panel system. It is a different kind of kit: convenient while driving and parked, but less easy to reposition for sun or pack away at night.
Portable panel comparison
Specifications below are representative of manufacturer-published product details for named models; check the current regional listing and manual before purchase. “Real-world output” is an indicative planning range, not a guaranteed rating: clouds, shade, panel angle, temperature, and power-station limits all affect it.
| Panel | Rated output | Published size and weight | Practical output in strong sun* | Overlanding trade-off |
|---|---|---|---|---|
| EcoFlow 220W Bifacial Portable Solar Panel | 220W front; up to 155W additional rear-side rating under specified conditions | Approx. 82 × 183 × 2.5 cm unfolded; 82 × 50 × 3.2 cm folded; approx. 9.5 kg | About 140–200W front-side; rear gain varies widely with surface and placement | Useful output-to-carry-size balance; rear-side collection is most helpful over bright, reflective ground |
| Jackery SolarSaga 200W | 200W | Approx. 54 × 234 × 2 cm unfolded; about 54 × 61 × 4 cm folded; approx. 8 kg | About 130–180W | Long unfolded profile needs clear ground and a suitable position; check connector and station compatibility closely |
| EcoFlow 400W Portable Solar Panel | 400W | Approx. 106 × 236 × 2.5 cm unfolded; approx. 106 × 62 × 3.5 cm folded; approx. 16 kg | About 260–350W | Faster charging potential, but bulky to stow and harder to keep steady in wind |
*These ranges are planning estimates for clear, high-sun conditions with good panel orientation and a compatible power station. They are not measured results for every site. A station with a lower solar-input ceiling will cap incoming power even when the panel could produce more.
What the ratings mean on a real trip
A panel’s watt rating is a peak under test conditions, not an all-day charging rate. A 200W panel producing an average of 120W for five useful sun hours supplies roughly 600Wh before conversion and charging losses. In practice, allow for imperfect angle, passing clouds, dust, cable losses, and the power station’s own limits; around 450–550Wh stored may be a more cautious planning figure on a good day. Heavy shade can cut output sharply.
For example, if your fridge, lights, and devices use 700Wh per day, a 200W panel may not replace the full daily draw reliably. A 400W panel can make the target more attainable in favorable conditions, but it cannot guarantee energy through bad weather. Reduce demand, add battery capacity, or plan a vehicle-charging backup if running out of power would disrupt the trip.
Choose by trip length, space, and setup tolerance
| Your situation | Better fit | Why |
|---|---|---|
| Weekend trips, modest loads, limited cargo space | 160–220W foldable panel | Less to carry and deploy; works best when daily energy use is controlled |
| Several days parked in sunny, open camps | 220W bifacial or a compatible 300–400W setup | More collection can shorten recovery time, especially when panels can be repositioned |
| Frequent moves between camps or uncertain weather | 200W-class panel plus alternator charging | Solar is intermittent; charging while driving adds a useful second source |
| Solo travel, little patience for setup, secure parking | Vehicle-mounted rigid panel, or a compact foldable panel | Mounted panels reduce repeated deployment; portable panels are easier to aim but require attention |
Compatibility and setup: avoid the costly mismatch
Before choosing a panel, compare its open-circuit voltage and operating current with the power station’s permitted solar-input range. Also verify the connector, polarity, and whether an adapter is approved for that model. Series connections raise voltage; parallel connections raise current. Either arrangement can exceed the station’s limits if planned from wattage alone.
- Check the station manual first. Record maximum solar watts, voltage range, current limit, and connector type.
- Position the panel in open sun. Keep it clear of vehicle shadows, branches, and dust. Even a narrow shadow across part of a panel can reduce output more than expected.
- Set the angle and recheck it. Aim the panel toward the sun and adjust as the sun moves. A stable, well-aimed panel often beats a larger panel left flat or partly shaded.
- Connect in the order specified by the manufacturers. Secure cables so they cannot be pulled by wind, tires, or people walking past.
- Check charging power after setup. If it is unexpectedly low, first inspect shade, angle, loose connections, and the station’s input cap before assuming the panel is faulty.
Setup time depends on the fold-out design, ground conditions, and how carefully the panel must be anchored. Allow several minutes to unfold, orient, connect, and secure a portable kit. A larger four-panel unit may take longer and occupy a broad footprint; it is not a “set it and forget it” solution in gusty weather.
Weather resistance and long-term ownership
Do not treat “weather-resistant” as permission to leave a portable panel outside overnight. Check the exact model’s water-resistance rating and care instructions, and keep the power station and exposed connectors protected from rain, dust, and standing water. Portable fabric hinges, kickstands, cable strain relief, and connector covers are likely wear points. Wind can tip a panel or stress its hinges, so fold it away when conditions become unsafe.
Clean the surface with a soft cloth and water when needed; abrasive pads and harsh cleaners can damage coatings. Let the panel dry before packing it, and avoid placing heavy gear on the folded case. On dusty routes, inspect connectors and cables regularly: grit and repeated bending can cause problems before the solar cells do.
Bottom line
For most travelers seeking the best premium portable solar panel kits for off grid overlanding, start with a 200–220W foldable model and choose the version that is electrically compatible with the power station you already own. Pick 400W when your daily energy use justifies the added cargo space and setup effort. If the trip involves frequent movement, heavy loads, or unreliable sun, pair solar with another charging method rather than relying on panel wattage alone.

Write Your Review
No reviews yet. Be the first to share your experience!