
🛒 Best Price Today on Amazon
Prime members get fast, free shipping on everything above, plus member-only deals. New members get a 30-day free trial — cancel anytime.
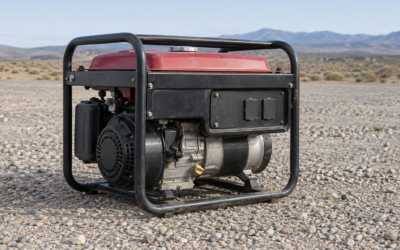
A generator carburetor meters fuel and air into the engine. When old gasoline dries inside it, it can leave varnish that blocks the tiny jets and passages responsible for starting, idling, and carrying a load. The result may be a generator that surges, stalls, starts only with choke, leaks fuel, or will not start at all.
Cleaning a carburetor is usually manageable for a careful DIYer, but doing it badly can create bigger problems: stripped bowl bolts, torn gaskets, incorrect linkage placement, fuel leaks, or damage to delicate jet openings. Work slowly, take photos before removing parts, and keep gasoline away from sparks, pilot lights, and enclosed spaces. Always run a portable generator outdoors, at least 20 feet from doors, windows, and vents.
As an Amazon Associate we earn from qualifying purchases at no extra cost to you. Product prices and availability are accurate as of the date shown and are subject to change.


What You Need
| Item | Why | Optional? |
|---|---|---|
| Owner’s manual or engine model number | Confirms fuel shutoff location, carburetor layout, and replacement-part compatibility. | No |
| Nitrile gloves and safety glasses | Protects skin and eyes from gasoline and aerosol cleaner. | No |
| Drain pan or metal fuel container | Catches fuel from the bowl and fuel line; a 1-quart container is usually sufficient. | No |
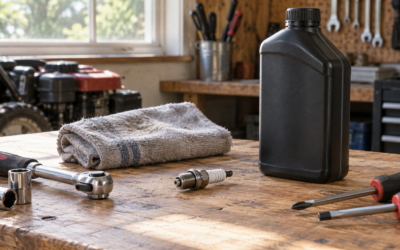
| Socket set, nut driver, and screwdrivers | Removes the service panel, air-filter housing, bowl bolt, and carburetor fasteners. | No |
| Carburetor cleaner aerosol | Dissolves varnish and deposits in the bowl, jets, and passages. | No |
| Clean rags and a small parts tray | Keeps fuel contained and prevents small screws, jets, and clips from getting lost. | No |
| Compressed air or hand air blower | Clears loosened debris and dries passages after cleaner is applied. | Recommended |
| Soft nylon brush, wooden toothpick, or fine copper wire | Helps remove visible residue without enlarging brass jet openings. | Recommended |
| Replacement bowl gasket, fuel line, or carburetor kit | Useful if seals are swollen, cracked, or leaking. Small-engine kits commonly cost about $10 to $20. | Optional |
| Fresh gasoline | Prevents the cleaned carburetor from being refilled with stale fuel. | No |
Step-by-Step
-
Move the generator outside and make it safe (10 minutes)
Set the generator on level ground outdoors. Switch the engine off, unplug all cords, and let a recently used engine cool completely. A hot muffler can ignite spilled fuel. Turn the fuel valve to Off, if your model has one, and remove the spark-plug boot so the engine cannot start accidentally.
If the generator has an electric-start battery, disconnect the negative battery cable as an added precaution. Put a drain pan beneath the carburetor area before opening any fuel connections.
-
Drain old fuel from the carburetor bowl (5 to 10 minutes)
Locate the carburetor behind the air-filter housing. Many generator carburetors have a small drain screw near the bottom of the float bowl and a clear or black drain tube. Aim the tube into your container, loosen the screw, and let the bowl empty. If there is no drain screw, you can drain the bowl when you remove its center bolt in the next steps.
Gasoline that smells sour, looks dark, or contains flakes should not go back into the fuel tank. Dispose of it through a local household hazardous-waste program or another approved fuel-disposal service.
-
Remove the air-filter assembly (10 minutes)
Take off the air-filter cover, filter element, and the housing or backing plate that mounts in front of the carburetor. Photograph the setup first, especially the positions of breather hoses, springs, and linkages. Keep fasteners in a tray in the order removed.
Inspect the air filter while it is out. A foam filter that is brittle or crumbling should be replaced. A heavily clogged paper filter can make a generator run rich and mimic a carburetor problem.
-
Remove the float bowl and inspect it (10 to 15 minutes)
Place the drain pan directly below the bowl. Remove the bolt or nut at the center bottom of the carburetor bowl. On many small engines, this fastener also serves as the main jet, so handle it carefully. Lower the bowl straight down and note its orientation; a deeper section or molded recess may need to face a particular direction during reassembly.
Look for gummy brown residue, water droplets, white corrosion, or loose debris. A light film is often cleanable. Heavy corrosion or pitting may mean replacement is more reliable than cleaning.
-
Clean the bowl, bolt, and jets (20 to 30 minutes)
Spray carburetor cleaner into the bowl, onto the bowl bolt, and through every visible opening in the bolt or main jet. Let the cleaner sit for a few minutes, then wipe away loosened deposits. Use a nylon brush or wooden toothpick for stubborn residue.
Do not force a steel sewing needle, drill bit, or stiff wire through a jet. These openings are precisely sized; enlarging one can make the engine run too rich, surge, smoke, or foul the spark plug. If a passage remains blocked, use a fine copper strand very gently, followed by cleaner and compressed air.
If accessible, remove the brass main jet and emulsion tube according to your engine manual. Spray through their holes and verify that cleaner or air passes freely. Keep your face clear of the spray path and wear safety glasses.
-
Check the float, needle, and fuel inlet (10 minutes)
With the bowl off, gently move the float up and down. It should pivot freely. As the float rises, the needle valve should close the fuel inlet. If the float is fuel-filled, cracked, sticking, or visibly distorted, replace it. Inspect the rubber tip of the needle for a groove or hardened surface.
Also inspect the fuel line for cracks, stiffness, or wet spots. Replace damaged line rather than relying on a clamp to solve a leak. Fuel leaks near a generator engine are a serious fire hazard.
-
Reassemble with sound gaskets and correct linkage placement (15 to 20 minutes)
Make sure the bowl gasket is seated evenly in its groove. Replace it if it is flattened, torn, swollen, or hard. Refit the bowl in its original orientation and tighten the center bolt snugly, but do not overtighten it; small carburetor threads strip easily.
Reinstall the carburetor, if you removed it completely, followed by the governor linkage, springs, hoses, air-filter backing plate, filter, and cover. Compare everything to the photos you took. A misplaced governor spring can cause erratic engine speed and unstable output voltage.
-
Refill, test, and check under a modest load (15 to 25 minutes)
Turn on the fuel valve and wait one to two minutes. Check around the bowl, fuel line, and carburetor for drips before starting. Add fresh gasoline, start the generator outdoors, and let it warm up for about five minutes.
After it idles smoothly, connect a modest load such as a 60- to 100-watt lamp or a small battery charger. Listen for repeated surging, stalling, or fuel leakage. If it runs well at a light load, increase gradually without exceeding the generator’s rated running wattage.
Mistakes to Avoid
- Cleaning only the bowl. A clean-looking bowl does not guarantee the main jet and internal passages are clear.
- Using stale fuel after cleaning. Reintroducing old gasoline can clog the carburetor again quickly.
- Skipping photos. Throttle and governor linkages can be confusing to reinstall correctly.
- Using oversized tools in jets. Never ream a jet with a drill bit or steel pick.
- Ignoring the air filter and spark plug. Restricted airflow or a fouled plug can produce similar symptoms.
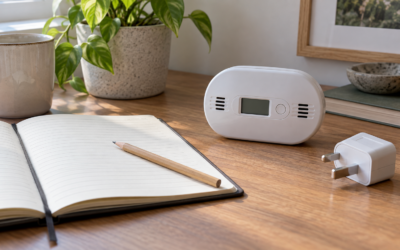
- Testing indoors or in a garage. Carbon monoxide is odorless and can be deadly, even with an open garage door.
- Buying a carburetor by appearance alone. Verify engine displacement, model number, mounting-hole spacing, choke style, and linkage configuration. A kit listed for a 196cc, 212cc, or 224cc engine may not fit every generator using that engine size.
How Often
For a generator used regularly, inspect the fuel system and run the unit under load about once every three months. Clean the carburetor when you notice starting trouble, hunting or surging, fuel overflow, or a need to keep the choke partially closed after warm-up.
If the generator will sit longer than 30 days, either drain the fuel system or use fresh fuel treated with a stabilizer rated for small engines. For seasonal storage, run the engine with the fuel valve off until it stops, then drain the bowl. This is the simplest way to prevent varnish buildup in 2026 and beyond.
When to Call a Pro or Replace
Call a small-engine technician if the generator still will not run after cleaning, if fuel pours from the carburetor, if the governor linkage is damaged, or if you are uncomfortable working around gasoline. Also seek help when the engine runs but produces unstable power, repeatedly trips breakers, or has smoke and knocking symptoms; those problems may not be carburetor-related.
Replacement is often smarter than deep cleaning when the carburetor body is cracked, the float-post supports are broken, corrosion has eaten into passages, or a replacement assembly costs roughly $10 to $25 while labor would exceed its value. Before ordering, match the engine code rather than relying solely on generator wattage. A 4,000- to 4,375-watt generator may use different carburetors depending on its engine and production version.
FAQ
Can I clean a generator carburetor without removing it?
You can drain the bowl and clean the bowl bolt or main jet on many models without removing the entire carburetor. This is useful for mild varnish. For persistent surging or a no-start condition, removing the bowl and cleaning accessible jets is usually more effective.
Why does my generator run only with the choke on?
This usually points to a restricted main jet or air passage. Choke reduces incoming air, temporarily compensating for insufficient fuel flow. Check for stale fuel, a clogged jet, air leaks at the carburetor gasket, and a blocked fuel filter.
Can I use brake cleaner instead of carburetor cleaner?
Use a product labeled for carburetors or throttle bodies when possible. Brake cleaner may damage certain rubber and plastic parts and is not designed for fuel-system deposits. Avoid soaking gaskets, rubber-tipped needles, and plastic components in any strong solvent.
Should I replace the carburetor instead of cleaning it?
Replace it when corrosion is severe, parts are damaged, or cleaning does not restore reliable operation. Low-cost replacement kits can be practical, but confirm compatibility carefully and transfer only the parts specified by the kit instructions. A properly cleaned original carburetor is often preferable to an incorrectly matched replacement.
Write Your Review
No reviews yet. Be the first to share your experience!